Generate load on Microsoft SQLserver Windows from HammerDB on Linux
Published: (Updated: ) by .
Often it’s nice to be able to drive Windows applications and databases from Linux, especially if you are more comfortable in a Unix environment. This post will show you how to drive a Microsoft SQL Server database running on a Windows server from a remote Linux machine. In this example I am using Ubuntu 22.04, SQLserver 2019, Windows 11 and HammerDB 4.4
Important Note.
To connect to SQLserver, you will need an ODBC driver on Linux. At time of writing (October 2022) – It is best to use ODBC Version 17. This is because Version 18 will fail to connect due to certificate issues. It is possible to use odbc.ini to overrride the certificate settings (specifically forcing ODBC to trust the server certificate) however HammerDB calls ODBC drivers directly and as such does not use odbc.ini.
For versions of HammerDB beyond 4.5 – you will be able to make the same overrides (force certificate trust) directly in HammerDB – but HammerDB 4.5 does not support that.
Installing ODBC Drivers
To connect HammerDB to Microsoft SQLserver you will need to install the base unixodbc driver – and the specific Windows ODBC driver. These steps work on Ubuntu 22.04
Step 1 Bring ubuntu up to date
Update and upgrade Ubuntu. Reboot if the kernel is upgraded during this stepsudo apt update; sudo apt upgrade; sudo reboot
Step 2 Install unixodbc
As long as apt is up-to-date, installing unixodbc will install the dependencies correctlysudo apt install unixodbc
Step 3 Install SQLServer Version 17 ODBC and tools
Copy/paste these instructions into a file named install-ms-odbc.sh and run as root e.g. # bash ./install-ms-odbc.sh
if ! [[ "16.04 18.04 20.04 22.04" == *"$(lsb_release -rs)"* ]];
then
    echo "Ubuntu $(lsb_release -rs) is not currently supported.";
    exit;
fi

curl https://packages.microsoft.com/keys/microsoft.asc | apt-key add -

curl https://packages.microsoft.com/config/ubuntu/$(lsb_release -rs)/prod.list > /etc/apt/sources.list.d/mssql-release.list

sudo apt-get update
sudo ACCEPT_EULA=Y apt-get install -y msodbcsql17
# optional: for bcp and sqlcmd
sudo ACCEPT_EULA=Y apt-get install -y mssql-tools
echo 'export PATH="$PATH:/opt/mssql-tools/bin"' >> ~/.bashrc
source ~/.bashrc
# optional: for unixODBC development headers
sudo apt-get install -y unixodbc-dev
Step 4 Prepare SQL server for remote connections
There are few things to do on the MS SQLserver side to allow remote logins. Google these tasks if you are unfamiliar with SQLserver.
- Enable SQLserver remote logins
- Enable logins to SQL server using username/password authentication (as well as Windows authentication).
- Allow simple login passwords
- Ensure a login called tpcc, pw tpcc is created and has enough permissions to connect
- Create a user for the login
create user tpcc for login tpcc; - Ensure the SQLserver TCPIP listener is running and firewall is not blocking
Step 5 – Check ODBC can connect.
Before proceding to install HammerDB, first check to see that you can connect to the DB with vanilla ODBC tools. Assume for now that the SQLserver is at IP address 192.168.1.69 and we created a user called tpcc with the password tpcc
$ /opt/mssql-tools/bin/sqlcmd -S 192.168.1.69 -U tpcc -P tpcc
1> select @@version
2> go
...
Microsoft SQL Server 2019 (RTM) - 15.0.2000.5 (X64)
...
Step 6 – Download and install HammerDB
- Get HammerDB 4.4
wget https://github.com/TPC-Council/HammerDB/releases/download/v4.4/HammerDB-4.4-Linux-x64-installer.run
OR - Get HammerDB 4.5
wget https://github.com/TPC-Council/HammerDB/releases/download/v4.5/HammerDB-4.5-Linux-x64-installer.run
In either case the script is a bash file that needs to be made executable. Note HammerDB 4.5 opened a TCL window during install. If running via ssh ensure that your connection allows remote X11 sessions. (xeyes is your friend as always). e.g.
chmod +x HammerDB-4.4-Linux-x64-installer.run
./HammerDB-4.4-Linux-x64-installer.run
Step 7 Create connection/workload script
Create a script like this which describes the database you want to connect to and the workload to run. Call it something like mssqls.tcl
dbset db mssqls
dbset bm TPC-C
diset connection mssqls_linux_server sqlserver
diset connection mssqls_uid nutanix
diset connection mssqls_pass nutanix
diset connection mssqls_linux_odbc "ODBC Driver 17 for SQL Server"

diset tpcc mssqls_dbase tpcc
diset tpcc mssqls_allwarehouse true
diset tpcc mssqls_driver timed

loadscript
vuset vu 5
vuset delay 0
vuset repeat 0
vuset showoutput 0
vuset logtotemp 1
vucreate
Step 8 Start HammerDB and load the script
:~/HammerDB-4.4$ ./hammerdbcli
HammerDB CLI v4.4
Copyright (C) 2003-2022 Steve Shaw
Type "help" for a list of commands
The xml is well-formed, applying configuration
Load the configuration scrtipt
hammerdb>source mssql.tclYou should get an output like below
Database set to MSSQLServer
Benchmark set to TPC-C for MSSQLServer
Changed connection:mssqls_linux_server from localhost to sqlserver for MSSQLServer
Changed connection:mssqls_uid from sa to nutanix for MSSQLServer
Changed connection:mssqls_pass from admin to nutanix for MSSQLServer
Value ODBC Driver 17 for SQL Server for connection:mssqls_linux_odbc is the same as existing value ODBC Driver 17 for SQL Server, no change made
Value tpcc for tpcc:mssqls_dbase is the same as existing value tpcc, no change made
Changed tpcc:mssqls_allwarehouse from false to true for MSSQLServer
Clearing Script, reload script to activate new setting
Script cleared
Changed tpcc:mssqls_driver from test to timed for MSSQLServer
Script loaded, Type "print script" to view
User Delay(ms) must be 1 or greater
setting to value: Repeat Delay(ms) must be 1 or greater
setting to value: Vuser 1 created MONITOR - WAIT IDLE
Vuser 2 created - WAIT IDLE
Vuser 3 created - WAIT IDLE
Vuser 4 created - WAIT IDLE
Vuser 5 created - WAIT IDLE
Vuser 6 created - WAIT IDLE
Logging activated
to /tmp/hammerdb.log
6 Virtual Users Created with Monitor VU
Step 9 Run HammerDB
Now you can run some workload by issuing vurun
hammerdb>vurunOutput should look something like this
Vuser 1:RUNNING
Vuser 1:Beginning rampup time of 2 minutes
Vuser 2:RUNNING
Vuser 2:VU 2 : Assigning WID=1 based on VU count 5, Warehouses = 10 (1 out of 2)
Vuser 2:VU 2 : Assigning WID=6 based on VU count 5, Warehouses = 10 (2 out of 2)
Vuser 2:Processing 10000000 transactions with output suppressed...
Vuser 3:RUNNING
Vuser 3:VU 3 : Assigning WID=2 based on VU count 5, Warehouses = 10 (1 out of 2)
Vuser 3:VU 3 : Assigning WID=7 based on VU count 5, Warehouses = 10 (2 out of 2)
Vuser 3:Processing 10000000 transactions with output suppressed...
Vuser 4:RUNNING
Vuser 4:VU 4 : Assigning WID=3 based on VU count 5, Warehouses = 10 (1 out of 2)
Vuser 4:VU 4 : Assigning WID=8 based on VU count 5, Warehouses = 10 (2 out of 2)
Vuser 4:Processing 10000000 transactions with output suppressed...
Vuser 5:RUNNING
Vuser 5:VU 5 : Assigning WID=4 based on VU count 5, Warehouses = 10 (1 out of 2)
Vuser 5:VU 5 : Assigning WID=9 based on VU count 5, Warehouses = 10 (2 out of 2)
Vuser 5:Processing 10000000 transactions with output suppressed...
Vuser 6:RUNNING
Vuser 6:VU 6 : Assigning WID=5 based on VU count 5, Warehouses = 10 (1 out of 2)
Vuser 6:VU 6 : Assigning WID=10 based on VU count 5, Warehouses = 10 (2 out of 2)
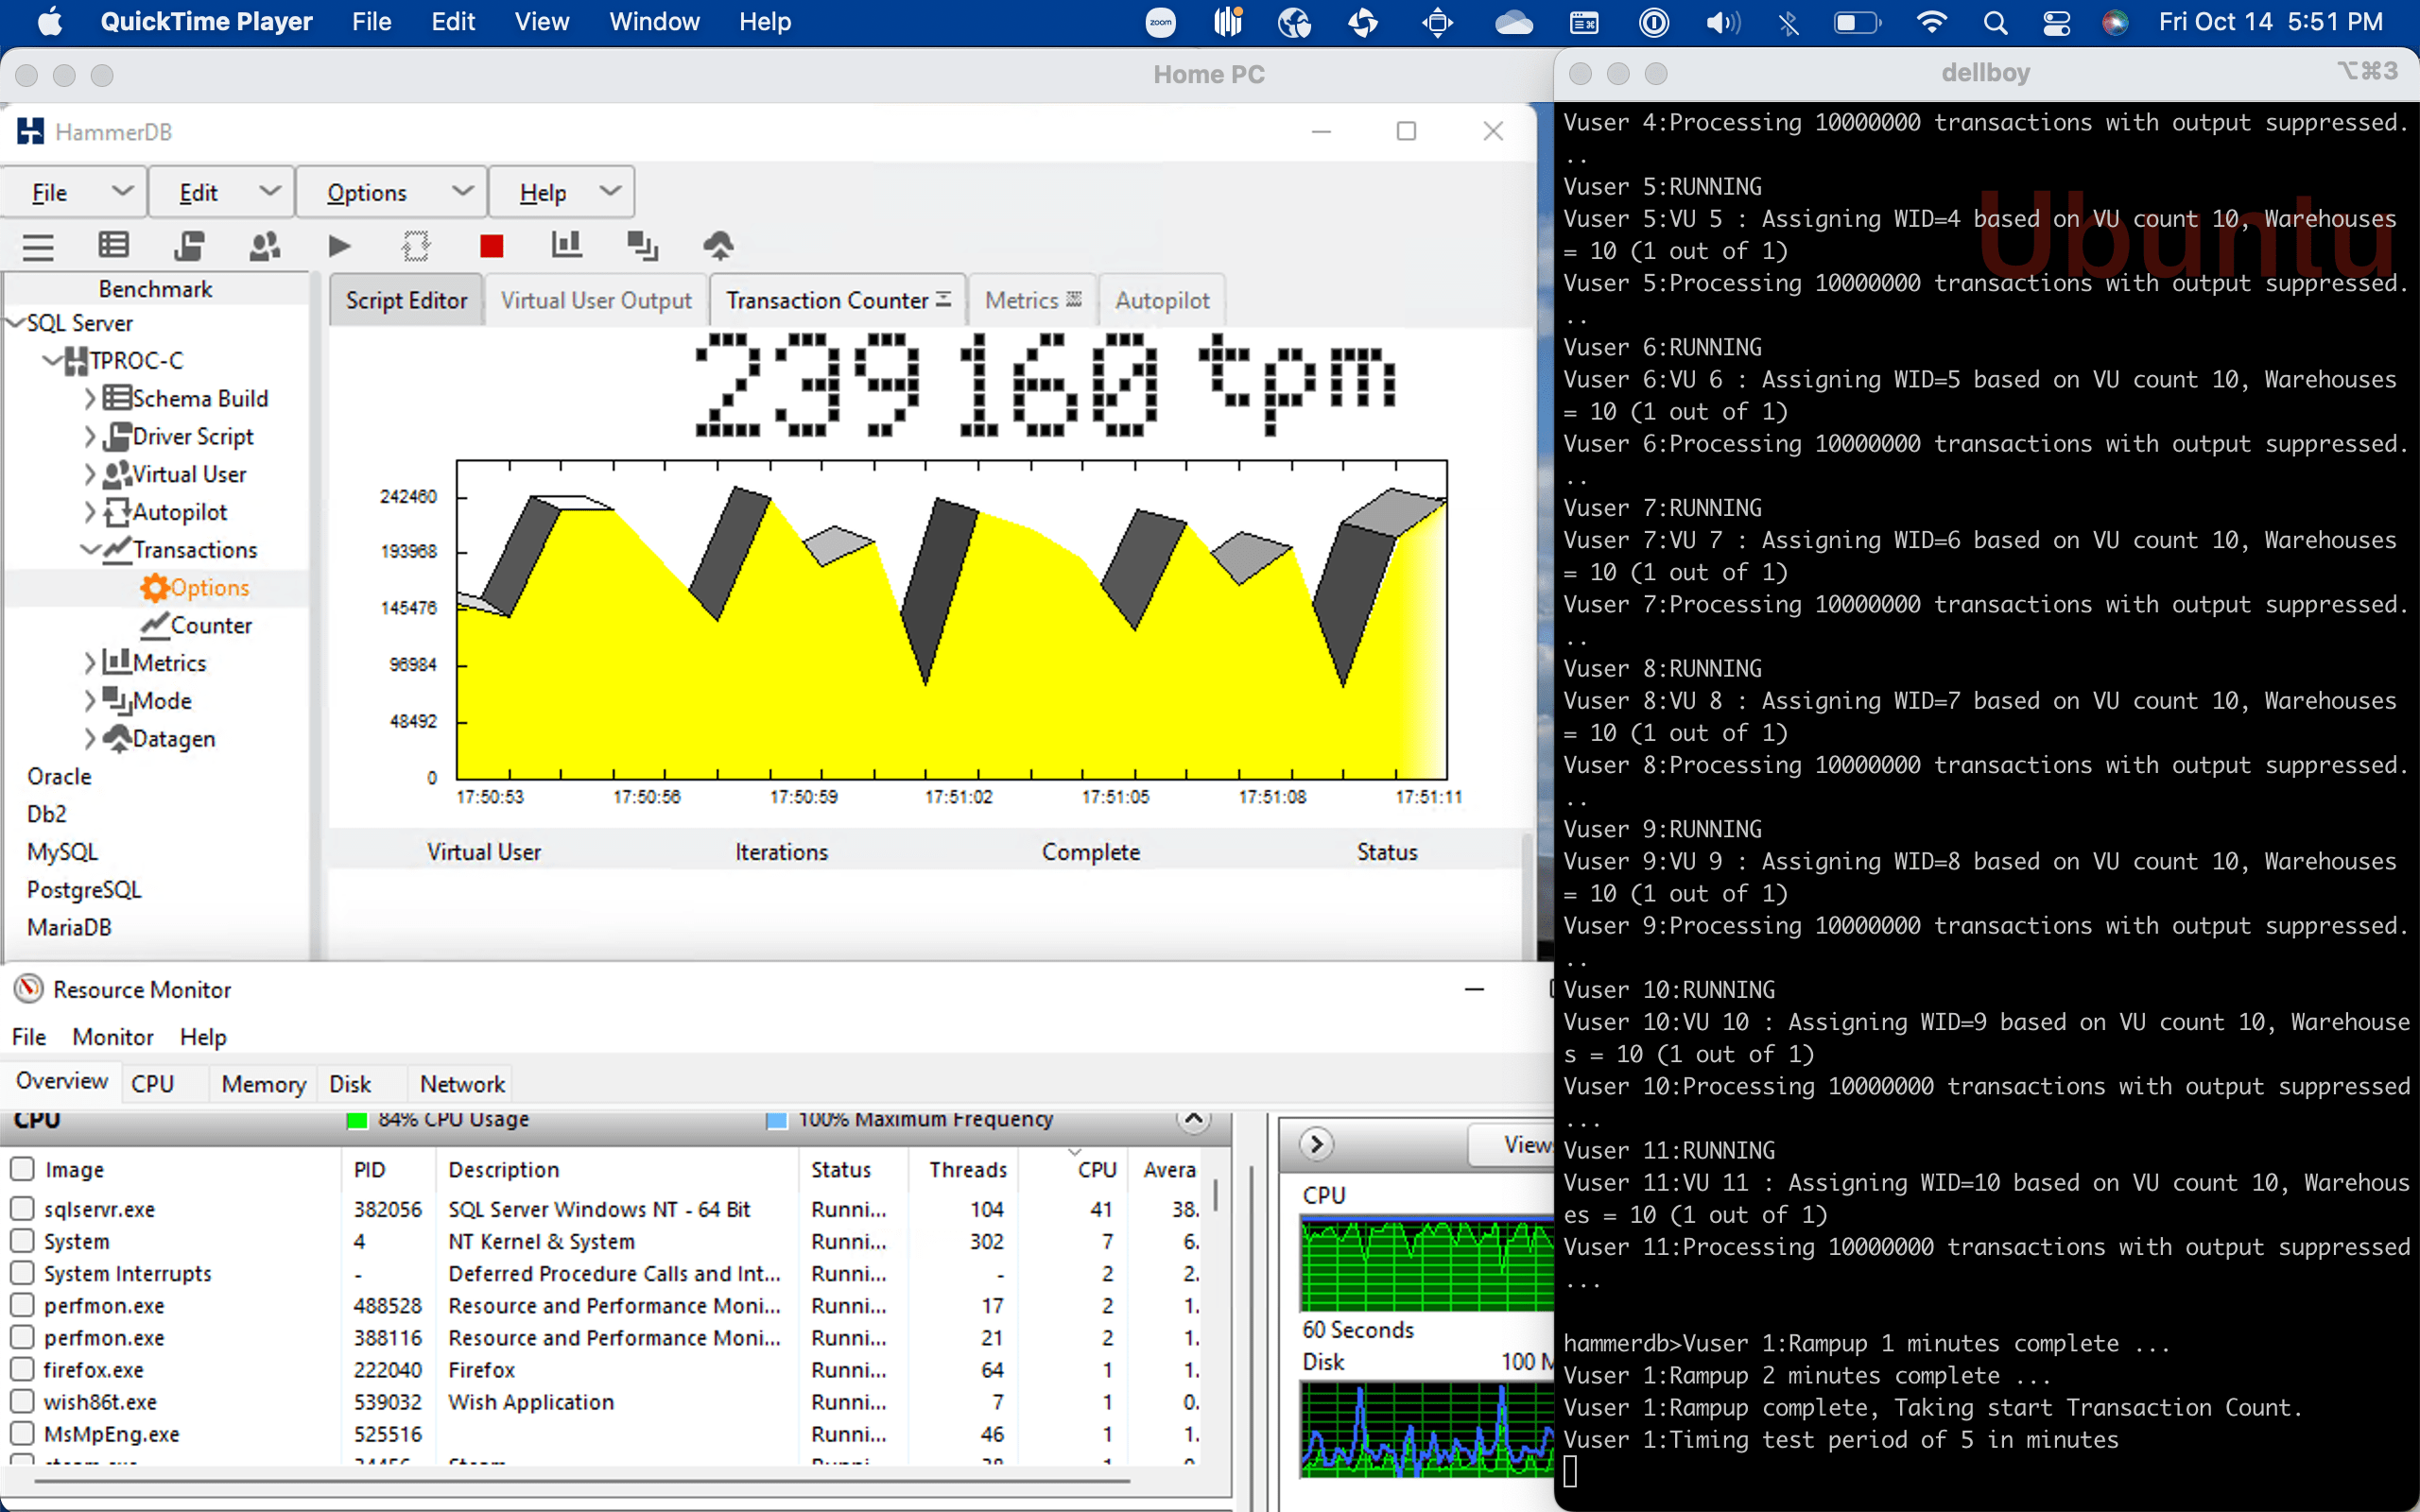
Vuser 6:Processing 10000000 transactions with output suppressed...At this point you should see SQLServer under load and running transactions. On the terminal you will eventually see this output
Vuser 1:Rampup 1 minutes complete ...
Vuser 1:Rampup 2 minutes complete ...
Vuser 1:Rampup complete, Taking start Transaction Count.
Vuser 1:Timing test period of 5 in minutes
Vuser 1:1 ...,
Vuser 1:2 ...,
Vuser 1:3 ...,
Vuser 1:4 ...,
Vuser 1:5 ...,
Vuser 1:Test complete, Taking end Transaction Count.
Vuser 1:5 Active Virtual Users configured
Vuser 1:TEST RESULT : System achieved 53077 NOPM from 121712 SQL Server TPM
Vuser 1:FINISHED SUCCESS
Vuser 3:FINISHED SUCCESS
Vuser 4:FINISHED SUCCESS
Vuser 5:FINISHED SUCCESS
Vuser 2:FINISHED SUCCESS
Vuser 6:FINISHED SUCCESS
ALL VIRTUAL USERS COMPLETE
Step 10. Enjoy
Now you have HammerDB running on Linux driving load to MS SQLserver.
Comments